top of page
Photograph of Pete Lake in Washington State with the sun about to go down behind the mountains.

Welcome!

What can you learn from a one-legged hiker? Hopefully a lot.


Read through the articles and pages and you will gain the knowledge you need to confidently and safely enjoy hiking and backpacking.  Get yourself ready for the trail and imagine how proud you’ll feel telling folks about your latest outdoor adventure.  

If you’re an amputee, you want to start with this blog post (Amputee Hiker Guide) where I go through the basics, advice from years of hiking, and links to more resources. Then watch this video for my 10 Tips and Tricks for amputee hikers. 

  • Deep dive and go through the Gear & Reviews dropdown to read reviews of gear I've used and tested along with examples and discussions of hiking and backpacking gear.

  • Read the articles in the Hiking/Camping Advice section for information on a variety of hiking, camping, and backpacking topics

  • Visit my YouTube channel Amputee Outdoors to see the Latest Videos and catch up on where I've been or reviewed lately. 


And of course, don't forget to check out my YouTube channel, Amputee Outdoors to see all my adventures, tips and tricks, and reviews. Thanks for visiting!

  • Distance: ~10 miles round-trip

  • Elevation Gain: ~1,000+ feet

  • Difficulty: Easy to Moderate


Getting to the Hyatt Lake PCT Trailhead


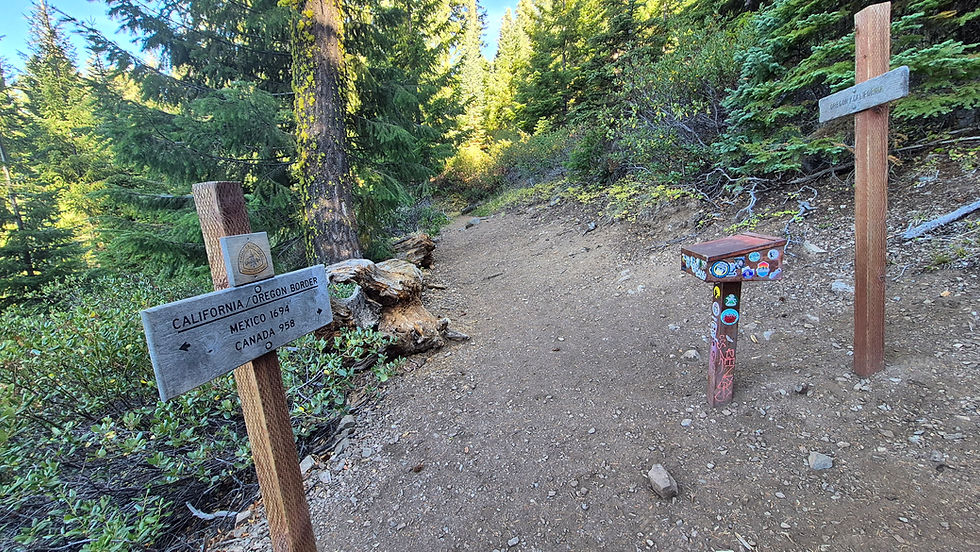
First off, it is worth noting that this trail does not have an official, dedicated trailhead.

To start, park safely off the road near the sign with directions to the Hyatt Lake Recreation Area. From there, look for the Pacific Crest Trail (PCT) marker and the path leading into the woods. While you can opt to park inside the official recreation area down the road—which requires a small fee—parking off the main road is free.


The author carrying a green backpack and hiking poles passing the Hyatt Lake Recreation Area sign on the PCT.

What to Expect: Trail Conditions, Hydration, and Tick Safety


I hiked this section of the PCT in late July in scorching 95°F (35°C) heat. Carrying four litres of water, I anticipated needing a resupply along the route. Based on notice postings at local potable water stations, my planned water stop was at Wildcat Campground.


Out of order water station with a sign on it telling hikers to go to the Wildcat campground to get water.

1. Forest Canopy and Ideal Hiking Seasons

I love starting hikes early in the day—the air is cooler and the morning sunlight filtering through the canopy is simply beautiful. This trail did not disappoint. The path is lined with:


  • Western Red Cedar

  • Douglas Fir

  • Ponderosa Pine

  • Noble Fir


I plan to hike this route again in Autumn and Spring, hoping for morning mist to catch the "god rays" that give forests such a mystical feel.


The author hiking on a narrow trail with the sun shining through the trees.

2. Exposed Meadows and Essential Gear

It is not all dense canopy, though. Open glades and sun-exposed meadows break up the timber line. Because these sections are open to direct sun, and the narrow single-track trail features brush and tall grasses rubbing against your legs, you will want to pack:

  • A high-UPF sun hat and sunscreen

  • Quality tick spray

  • Permethrin-treated clothing (I strongly recommend treating your clothes and gear beforehand, as well as applying skin-safe tick repellent if wearing shorts).

In the height of summer, these meadows showcase a light khaki colour palette with only a few hardy shrubs in bloom. Visiting in Spring yields a completely different experience with vibrant greens and wildflowers.


Hiking the Pacific Crest Trail (PCT) Section


While this PCT stretch runs parallel to Hyatt Lake, you will only catch occasional glimpses of the water where clearings align. Don't worry—the views at the summit lookout point more than compensate for it.


Fine Dust and Thru-Hiker Traffic

The trail surface consists mostly of packed dirt, punctuated by protruding rocks. You can easily set a solid, steady pace without constantly staring down at your feet.

However, because this is an active section of the Pacific Crest Trail, it sees heavy daily foot traffic. Constant use grinds the dirt into a fine, talcum powder consistency. Every step kicks up a brief dust cloud that eventually coats your boots, trousers, skin, and—in my case—my prosthetic leg. I met five PCT thru-hikers on this stretch, all sporting the signature knee-high layer of trail dust!


A close up shot of the trail taken from behind the author showing his prosthetic leg.

Practising Forest Bathing (Shinrin-yoku)

While it is tempting to power through at a fast pace, I recommend slowing down to absorb the forest atmosphere:

  • Pause and admire the ancient, downed old-growth logs.

  • Stand completely still and listen to the local birds.

  • Challenge yourself to identify different tree species from a single spot.

Call it forest bathing, forest therapy, or simple mindfulness—taking time to be still in the forest feels incredible.

Speaking of old growth, you will pass stumps from timber harvests of decades past, alongside living giants and trees that are well on their way to reaching old-growth status in another century or two.


The author standing next to a massive tree in the forest on the Pacific Crest Trail.

Reaching the Hyatt Lake Lookout Point


The junction sign pointing left toward Hyatt Lake Lookout is a bit weathered, but still easily noticeable.

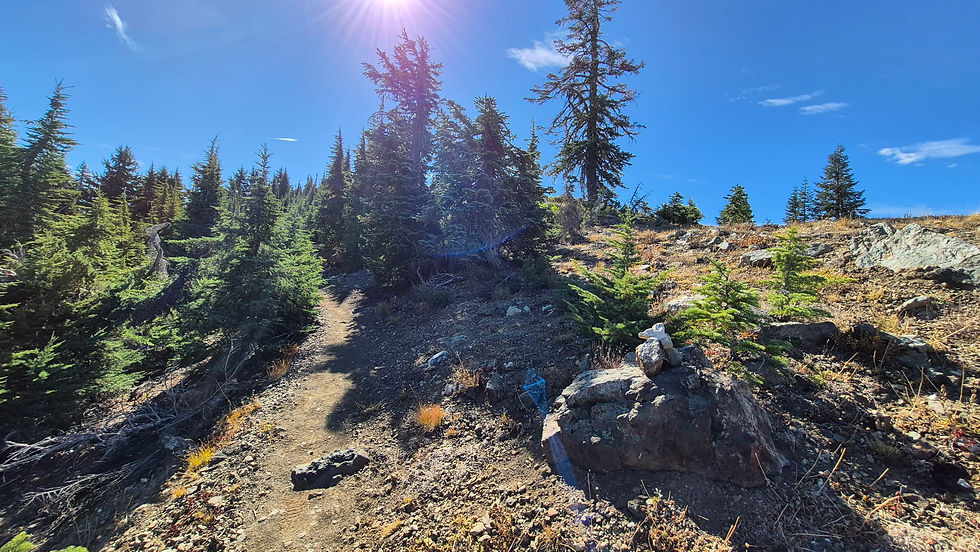
The path climbs a bit steeper than the main PCT, but remains manageable until you break out of the tree line. This upper section is the only part without packed dirt; it is rocky and slightly loose underfoot, though a sturdy pair of trekking poles will keep you easily balanced.

On my way up, I flipped up my sunglasses (yes, flip-up sunglasses—I'm single-handedly bringing them back!) to admire the vibrant green tree moss. Spending most of my life in the Pacific NorthWET of the western Cascades has given me a deep appreciation for mossy forest detail.


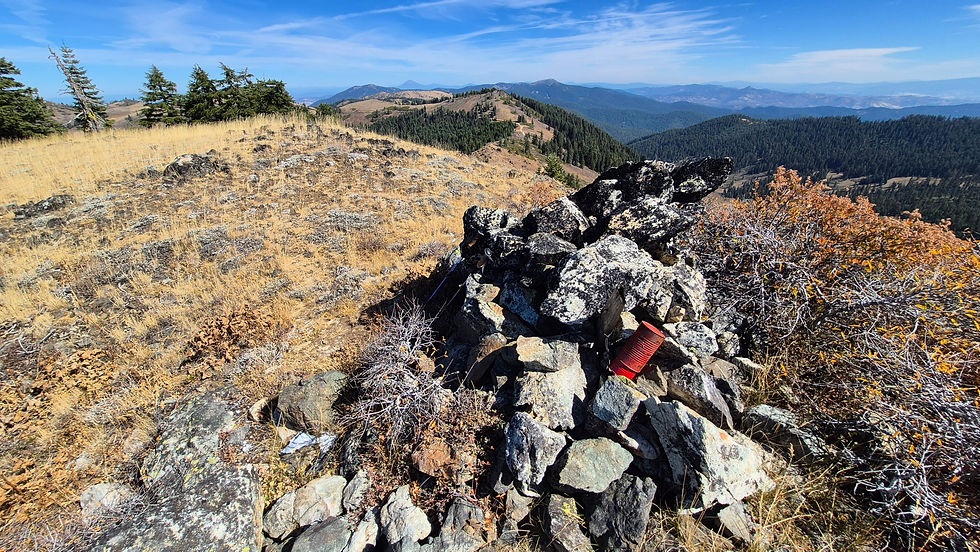
A view from the Hyatt Lake Lookout point with Hyatt Lake below and in the distance, Mt. Ashland.

The Summit Views: Mt. Ashland & Mt. McLoughlin

Reaching the summit rewards you with sprawling views of:

  1. Mt. Ashland in the distance

  2. Hyatt Lake directly below

  3. Mt. McLoughlin towering nearby


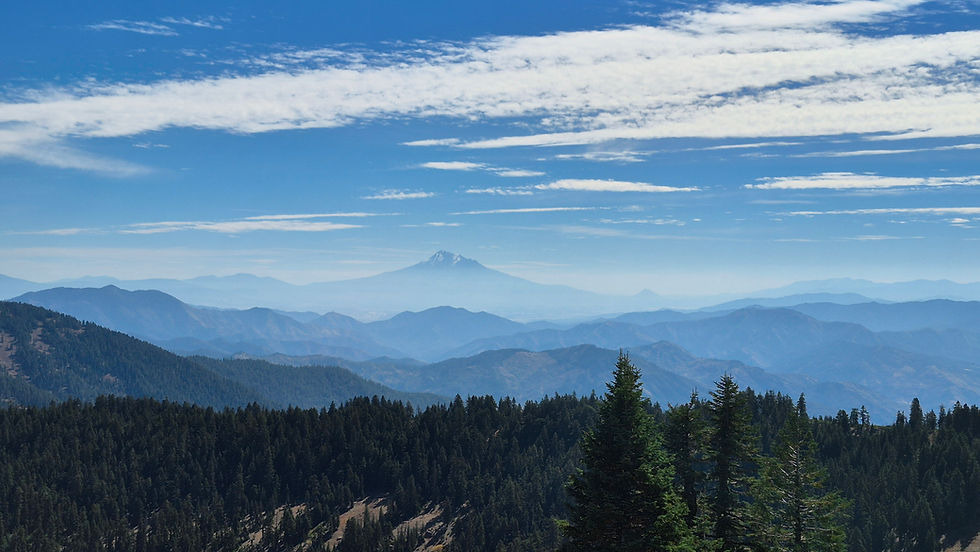
The Secret South Viewpoint: Facing Mt. Shasta

After enjoying lunch, watching the clouds, and listening to the bees, I noticed a faint, unofficial trail continuing in a southerly direction.

Following this primitive path leads to a dramatic view looking straight south at Mt. Shasta! It is well worth the extra few steps to take in the breeze and the expansive views before heading back down to the PCT.


The view from the southern viewpoint with Mt. Shasta in the distance.

Water Resupply: Horse Camp and Wildcat Campground


To replenish my water supply for the trek back, I took the short, easy descent down to Horse Camp.

Water Tip: Horse Camp features horse pens and a paved road bend, but no potable water supply unless you trek down to the lake with a water filter.

Since I didn’t bring a filter, I pushed onward to Wildcat Campground, an RV/caravan site equipped with a pit toilet and a hand-pump water well (located to the left of the facilities).

After a few cranks of the squeaky lever, the pump delivers cool, clear, delicious water. I refilled my stainless steel water bottles, (I don't like hydration packs and prefer stainless steel water bottles), drenched my sun hat to cool down, and hiked back up the connector trail to rejoin the PCT toward my car.


The author pumping water into a steel water bottle at Wildcat Campgrounds.

Final Thoughts and Summary


If you hike this route during the cooler Spring or Autumn months, you can likely skip the side trip to Wildcat Campground for water. It is an approachable, highly rewarding trail, and chatting with passing PCT thru-hikers along the way is a wonderful bonus. Happy hiking!


USFS olive green backpack

Outdoor gear often carries stories that are sometimes older than the trails we hike today, and the rugged green canvas rucksack featured here is one of those rare pieces of American outdoor history. At first glance, its olive‑drab color and heavy construction suggest a U.S. military origin, but a closer look reveals something far more interesting: this pack was almost certainly built for the U.S. Forest Service during the mid‑20th century, not the armed forces.


Between the 1950s and 1970s, the USFS relied on durable, rubber‑lined canvas rucksacks for wildland firefighting, smokejumper operations, hotshot crews, and backcountry trail maintenance. These packs were designed to survive heat, abrasion, rain, sap, and chemical retardant—conditions far harsher than typical military field use. Their construction was intentionally simple: a large single compartment, minimal external pockets, a wide compression strap, and a lace‑top grommet closure that allowed firefighters to overstuff gear while wearing gloves.


Interior of USFS backpack showing the black rubber waterproof lining.

The rubberized interior is one of the strongest clues to its identity. U.S. military packs almost never used full rubberized liners, but USFS contractors did—especially Anderson Industries, the most likely manufacturer of this pack. Anderson produced thousands of canvas rucksacks for the Forest Service and Bureau of Land Management, many of which were mounted to whatever external frame the user already owned. That explains why the frame currently attached to this pack is aftermarket: the original frame was either lost or replaced decades ago.


Close up of USFS backpack showing after market external frame, back support and hip belt.

These rucksacks were used by smokejumpers, hotshot crews, and wilderness rangers during a formative era in wildland firefighting—before modern internal‑frame packs, Nomex uniforms, and modular load‑bearing systems existed. Today, surviving examples are rare. Most were destroyed through hard use, exposure, or simply discarded when nylon packs replaced canvas in the late 1970s.


For collectors, this pack represents a unique intersection of American outdoor history: part firefighting heritage, part backcountry tradition, and part early load‑carriage engineering. In today’s market, a USFS canvas rucksack in good condition typically sells for $180–$220, with higher values for examples retaining their original frame.


Below is a comparison chart showing how this pack differs from well‑known U.S. military rucksacks of the same era.


USFS Canvas Rucksack vs. U.S. Military Packs (1950s–1970s)

Feature

USFS Canvas Rucksack

ALICE Pack

M1965 Field Pack

M1956 Pack System

Primary Use

Wildland firefighting, smokejumpers, hotshot crews, trail crews

U.S. Army infantry

Cold‑weather field operations

General infantry load system

Material

Heavy canvas with rubberized interior

Nylon

Cotton duck canvas

Cotton duck canvas

Closure Style

Lace‑top grommet closure

Drawstring + flap

Flap with buckles

Flap with buckles

Pocket Layout

Minimal pockets, large single compartment

Multiple external pockets

Small external pockets

Multiple external pockets

Frame

Often used with aftermarket external frames

Optional external frame

No frame

No frame

Water Resistance

High (rubberized interior)

Moderate

Low

Low

Era

1955–1975

1973–present

1965–1970s

1956–1967

Load Purpose

Tools, hoses, gear, fire equipment

Modular infantry load

Cold‑weather gear

General infantry gear

Rarity Today

High (few survive)

Common

Uncommon

Common

Collector Value

$180–$220

$60–$120

$80–$150

$40–$90


Length: ~5 miles (more if you chase the social trails)

Elevation Gain: 944 ft

Time: 2.5–3 hours


Amputee Outdoors host, Glenn Barfield, posing at Mt. Grizzly viewpoint with Mt. Shasta in the distance.

Grizzly Peak sits just east of Ashland, Oregon, tucked above Dead Indian Memorial Road and accessed via Shale City Road. The final stretch is a classic Southern Oregon forest road—rutted dirt, scattered potholes, and enough dips to make even high‑clearance SUVs pay attention.


Grizzly Peak trailhead showing the toilet and parking lot.

The trailhead is surprisingly civilized: vault toilet, decent signage, and parking for roughly 20 vehicles. On weekends it overflows fast, pushing late arrivals onto the narrow approach road and turning the last half‑mile into a tight squeeze.


Forest Ascent

The trail opens with a steady climb through a mixed conifer forest—Douglas‑fir, Western red cedar, Western hemlock, pockets of ponderosa, and the occasional noble fir. Many of these trees drip with Usnea (Oregon bearded lichen), hanging in pale green curtains that give the forest an almost primeval feel.


Douglas Fir trees with Oregon Bearded Lichen hanging from the branches.

The grade is front‑loaded but never punishing. After the initial push, the trail settles into long stretches of mellow slopes up (and occasionally down), singletrack. The tread is packed dirt with minimal rock—fast, easy hiking that lets you cruise without watching every footfall.


Meadows, Clearings & Tick Country

Soon the forest breaks into a series of meadows and open clearings. They’re idyllic, cinematic even, but they’re also prime tick habitat. Experienced hikers know the drill: treat your boots, socks, pants, and gear before you start. These meadows are worth lingering in, but only after you’ve done your prep.


Meadow on Grizzly Peak with yellow flowers, tall grasses, Douglas Fir and Western Hemlock

The Lollipop Loop

The route forms a lollipop: climb the “stick,” reach a Y‑junction, then choose your direction.


Glenn arriving at the Y intersection of the Grizzly Peak lollipop loop trail.

Heading left delivers an early reward—a short social trail leading to a preview viewpoint. From here you can already spot Mt. Shasta, Mt. Ashland, I‑5, and Ashland tucked into the valley.


View of Mt. Shasta from the sneak peak social trail off the main Grizzly Peak trail.

Back on the main loop, the trail rolls through more meadows and shaded forest pockets. Eventually the trees thin and the terrain shifts: the soft dirt gives way to a rocky plateau, and a stand of burnt trees appears ahead. That’s your landmark—your signal that the real payoff is close.


View of burnt trees along the Grizzly Peak trail indicating you are close to the main viewpoint.

Final Ascent & Exposed Ridge

The last climb is on open, rocky terrain with zero shade. Bring sun protection: wide‑brim hat, umbrella, sunglasses, and sunscreen. As you ascend, Mt. Shasta dominates the horizon, and the trail bends right past the charred trees toward the viewpoint.


A dozen hikers at the main Grizzly Peak viewpoint.

Traffic patterns vary—on my visit I saw only two hikers on the approach, but a dozen clustered at the viewpoint from the opposite direction of the loop.


The Viewpoint: Grizzly Peak’s Crown

The plateau offers excellent views, but the pièce de résistance is a rocky prominence that feels purpose‑built for hikers. From this perch you get a sweeping, unobstructed panorama:

  • Mt. Shasta

  • Mt. Ashland

  • Ashland, Talent, Phoenix, Medford

  • Roxy Ann

  • Upper & Lower Table Rock

  • The Rogue Valley stretching toward Shady Cove

At 5,630 ft, you’re high enough that inbound aircraft to Medford pass below you on approach—a surreal bonus.


Glenn, host of Amputee Outdoors, standing at the best viewpoint on Grizzly Peak.

View south from the best viewpoint on Grizzly Peak, showing Mt. Shasta, I-5, Mt. Ashland, and Ashland.

Loop Return

After soaking in the views, the loop continues along the valley-facing side, delivering nearly continuous vistas of Ashland, Talent, and Phoenix. The trail narrows here, brushing against tall grass and wildflowers.


Eventually you emerge into a massive meadow glowing with bright yellow blooms. It’s a striking contrast to the rocky summit—wide, open, and unexpectedly beautiful.


Huge meadow on Grizzly Peak filled with bright yellow flowers and fir trees in the distance.

Optional Summit Spur

Near the Y‑junction, an unmarked trail branches left toward the true summit of Grizzly Peak (5,850 ft). It’s rocky, short, and—honestly—not worth it. The summit is tree‑choked with no real views. Tag it if you’re a peak‑bagging purist; otherwise, skip it and enjoy the easy descent back to the trailhead.


Grizzly Peak summit with views blocked by trees and author looking disappointed.

Seasonal Notes

Locals report that Grizzly Peak is hikeable year‑round. In winter, microspikes or crampons are usually enough; snowshoes are rarely required. The meadows and views shift dramatically with the seasons, making this a trail worth revisiting in fall, winter, and spring.

Be the first to know when Amputee Outdoors is updated!

Thanks for subscribing!

  • YouTube
  • Instagram
  • Facebook

©2020 by Amputee Outdoors. Proudly created with Wix.com

bottom of page